![]()
![]()
![]()
![]()
![]()
![]()
![]()
![]()
How To Create the ISA 2004 Usage Report
by Andy Goodman [SBS-MVP]
One of things you will notice after installing ISA 2004 is you no longer have the Web Usage Data in the Usage Report. To regain this important information all you have to do is configure your ISA Server 2004 to deliver it to you. It is not a painful process at all so let's jump right in.
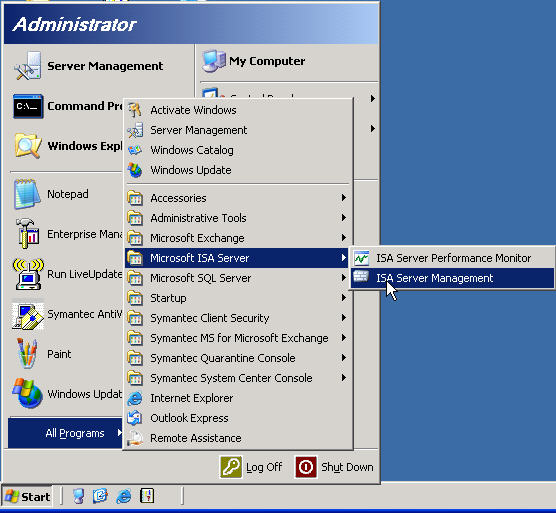
The first thing you need to do is open the ISA Server Management console from the start button
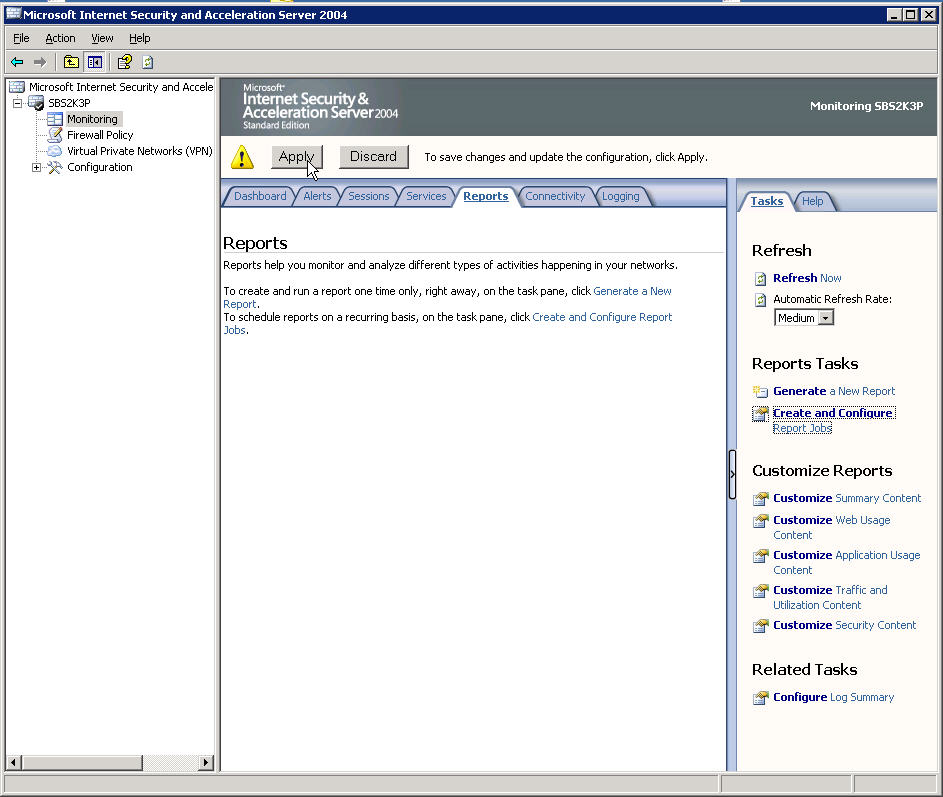
Click in the Monitoring section under your server name and then click on the Reports Tab
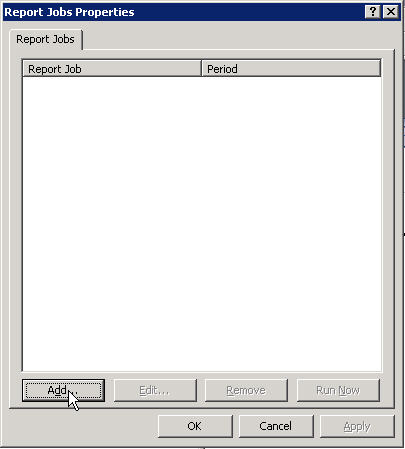
If you have never run a report the list will be empty (note for later, even after configuring the report it will be empty, the display only shows reports that have run)
Click in the right hand panel on Create and Configure (see the little hand below)

The Report Jobs window will open, click on the Add button
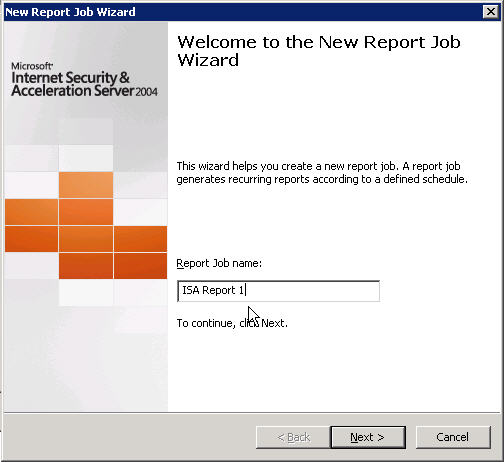
When the New Report Wizard opens give your report a name.
Since doing the screenshot below, I have come to find out there is an issue
with spaces in the report name, so my advice to you is to either use a 1 word
report name
or name your report something like ISA_Report_1 with underscores instead of
spaces.
Extra Info you don't need for the curious only The issue
is, if there is a space in the report name
later when it e-mails the link to you Outlook will not parse the url correctly
and then link will not be
clickable although you could still copy and paste it.
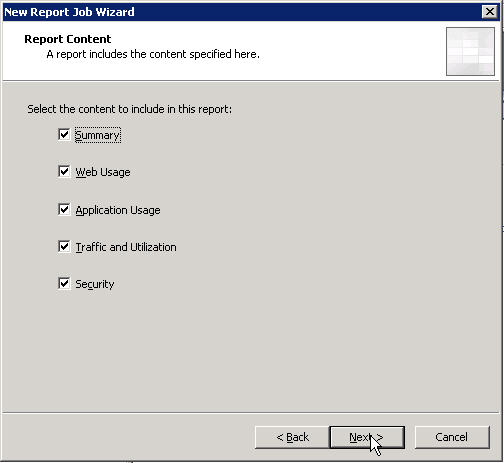
Then you be be presented with the different categories of information to choose from. I recommend selecting all of them until you are more familiar with what they contain. You can always come back and reduce the amount of info by editing the report job..
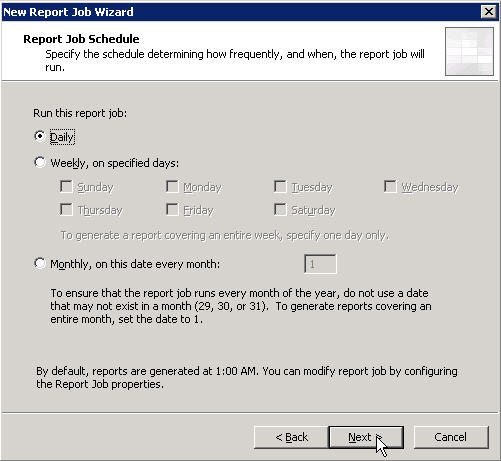
Next you get to select how often you want the report job to run. Here again I would start out with Daily and cut it back later on after you get a feel for what the content should like like.
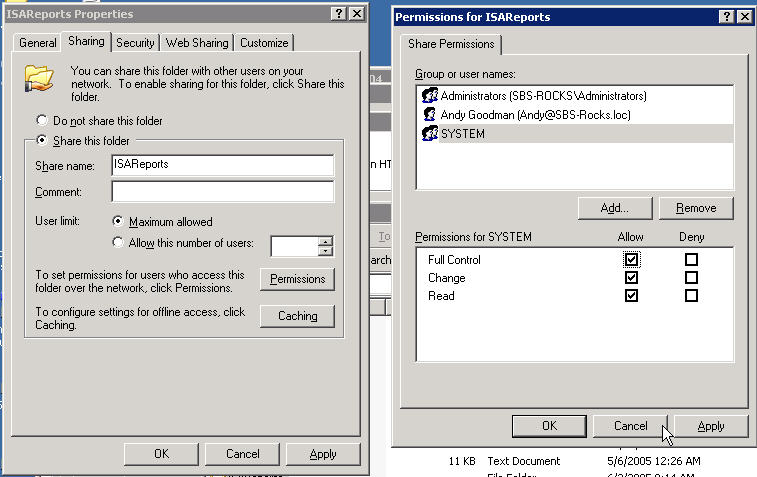
OK so if you are like me and jump right into things you are about to find out the wizard wants a shared folder to put the report in on the server. So create a folder and share it out. I would remove the everyone read permissions as some of the report information could be sensitive and you don't want to be sharing it with everyone on the network. Notice that I have given the system full right to the share which I always find a best practice when restricting permissions.
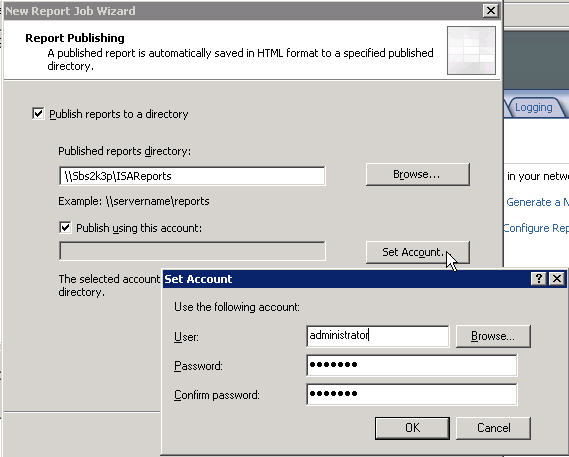
So now we can choose our new share for the location to
publish the report.
Make sure you use an account that you gave full permissions
to.
Also be careful here, if you don't use network path like the example and instead
use a
local path which the browse button below defaults to such as
C:\somefolder the link in
the e-mail message will not be resolvable. This path should point to the share
we created
in the previous step.
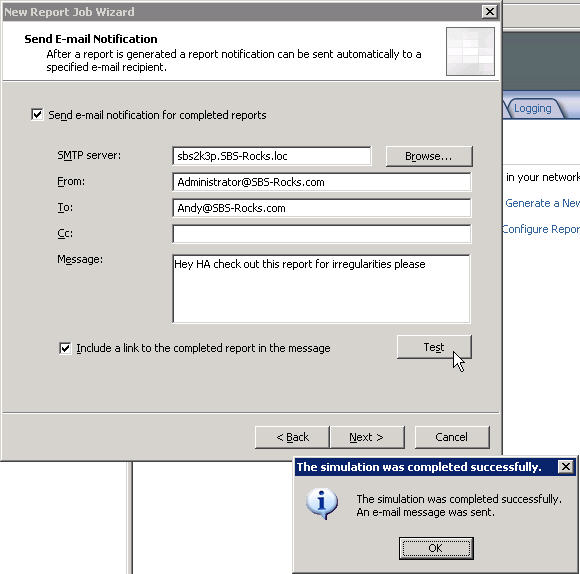
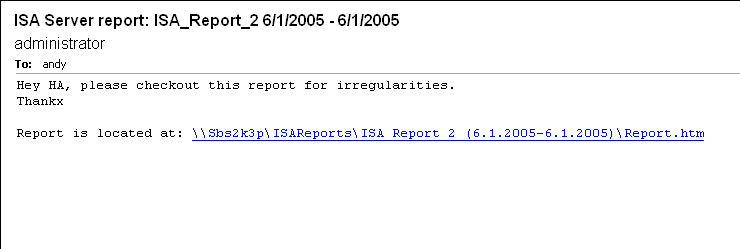
Next you can specify to send a notice to yourself or some
else each time the report job runs.
Make sure you hit the test button to verify you didn't make a mistake typing.
You will be presented with obligatory Completing the Wizard Screen, click finish, you are not really done yet.
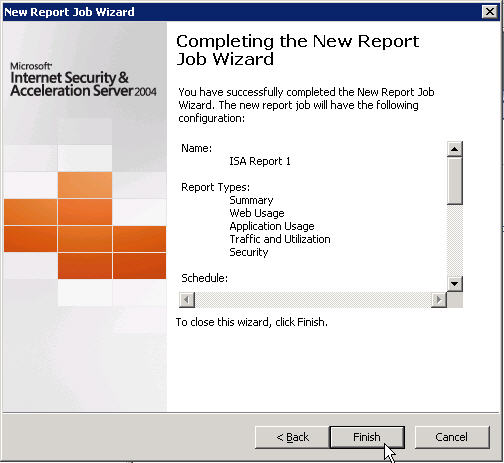
As with almost everything you add or change in ISA 2004 you must click the Apply button for your changes to take effect.
Ok so now it is really done.
If you are curious, this is what the e-mail looks like it
will send out to you if you chose that option.
Now get busy and set up your report :>)
By the way, I recently got an e-mail from David Maskell with a link to his article about how to publish these reports.
Take a look at David's Article on the ISAServer.org site
Thankx for Sharing this with us David!
.