![]()
![]()
![]()
![]()
![]()
![]()
![]()
![]()
Windows
Small Business Server 2003, Part 3
SBS2K3 Installation Walk Through
Suite Setup
by Andy Goodman [SBS-MVP] with Special Thanks to Jim
March
Last time we left off with an Icon on our desktop to continue setup. Please double check your clock is set to a date prior to 11/24/2003 if you are doing your install before the fix for SharePoint has been resolved, See KB Article 833019, also there may be updated info on this issue at sbslinks.com/Sharepoint.htm
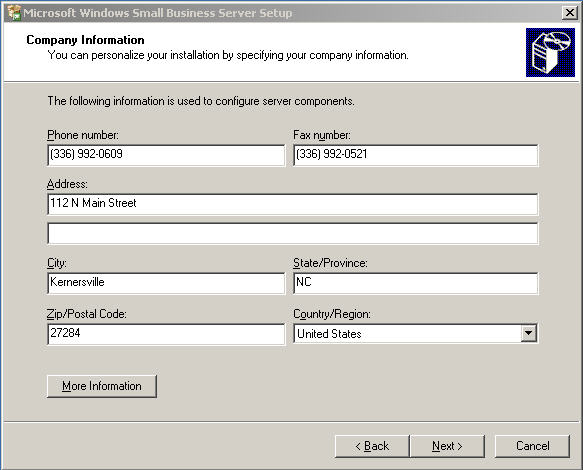
Once you restart the setup either from the icon that was created on your desktop or from SBS CD1 you will be presented with the following screen for general company information
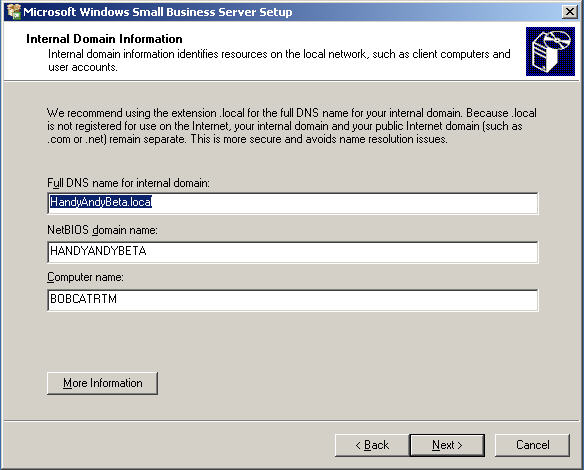
Next, you are asked for domain name info. Do not glaze over this! This is a forever setting -- changing it requires reinstalling SBS. Until recently, Microsoft had recommended using an extension of ".local" for all installations. However, there is a conflict with a Mac OSx networking component. So, if you are planning on having any Mac's running OSx on your LAN, use something else, like ".company" or ".internal". Please do not use ".com" as it will cause you grief down the road, if not immediately. As you can see, I have no such plans, so I have used ".local" as I am a creature of habit.
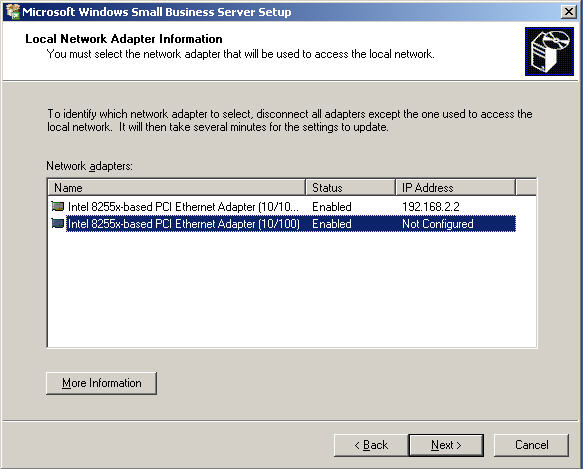
Now you are ready to choose your Nic for the LAN, of course this is assuming you have two Nics to start with. In this case the bottom one is the one I chose for the LAN as the top one was already configured via my router. If you have a live connection, it will be disabled during this process and you will need to re-enable it later. (link here to next article to-do list)
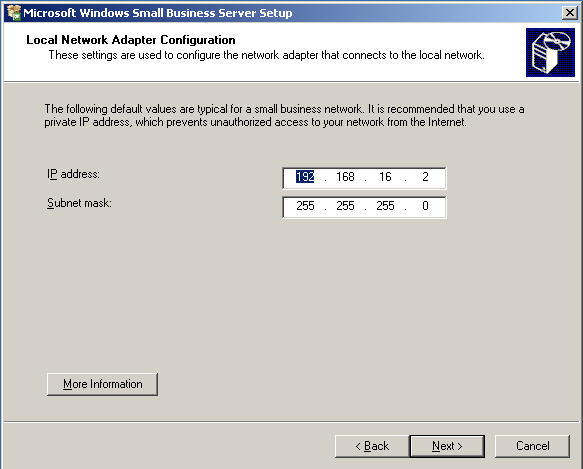
This is where you pick the address for the server. Unless you have a driving need, I recommend leaving it at the default. It just makes it easier if someone has to come in behind you for things to be where they expect them. You can use any private address here without hurting anything.
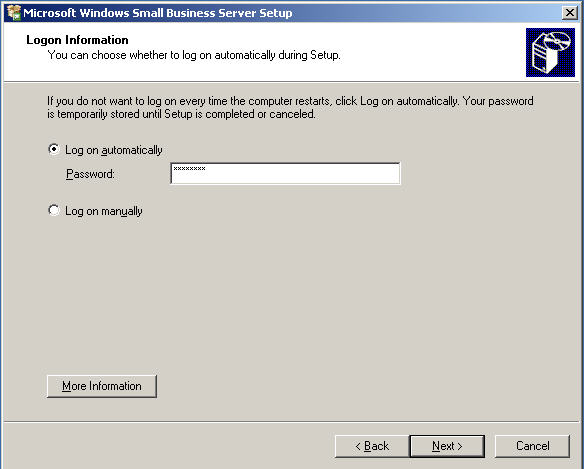
Unless you want to baby sit the entire process, go ahead and put in your administrator password here. When setup finishes, it will be removed and it will help the process along if setup doesn't have to wait for you to logon after each reboot.
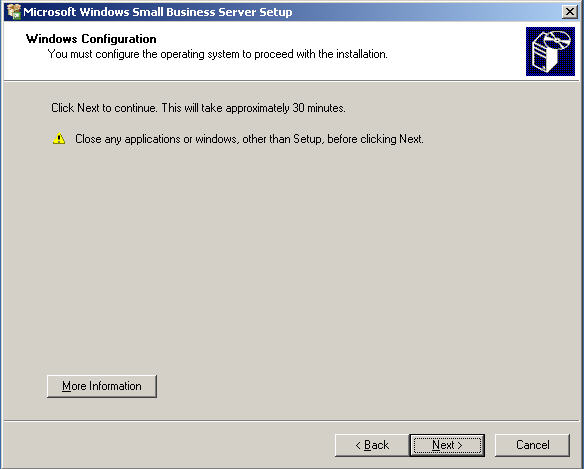
This is the updated version of the obligatory "click Next - We are really gonna start now" screen. Thank-you, Bill, for finally giving us an idea how long it will be until we are needed again. It may not be exactly 30 minutes but it sure is nice to have an idea.
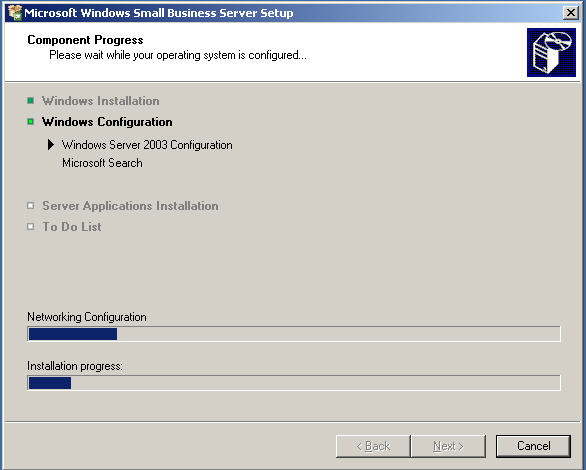
The screen will continue updating as components are installed
OK, 30 minutes have gone by and now it
is time to select what to install and where to install it.
The first screen is the defaults
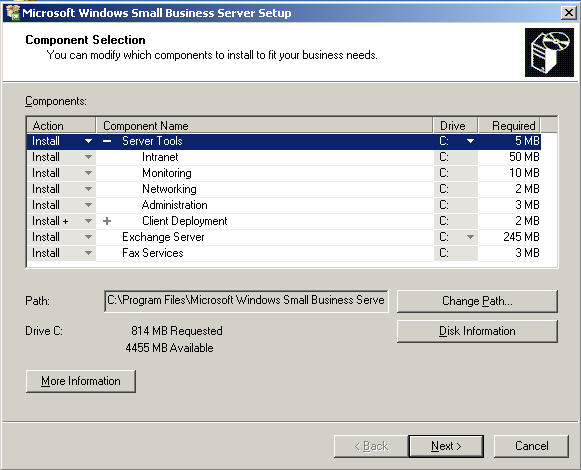
And this is how I broke it up. I try not to put anything on C that does not have to be there, as I limit it to 7.68 Gig which is an old int13 limitation. But you never know when you may need to use some old utility, and it is better to be prepared than un-bootable.
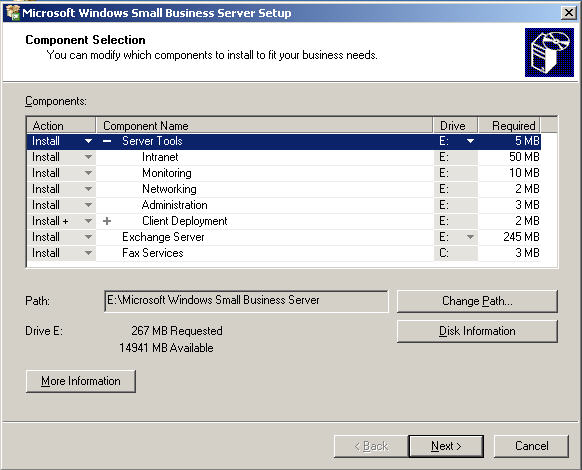
And now we choose our data paths. As you can see, I have the main OS files on C:, the data files on D: and the rest of the program files on E:.
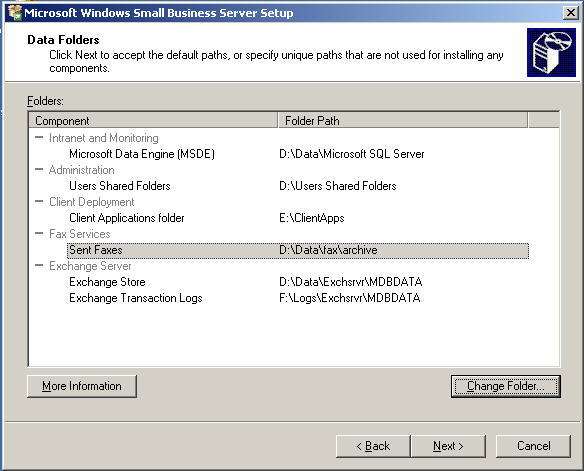
This just shows you what you chose in case you want to change your mind. So, if you're happy with your selections, click Next.

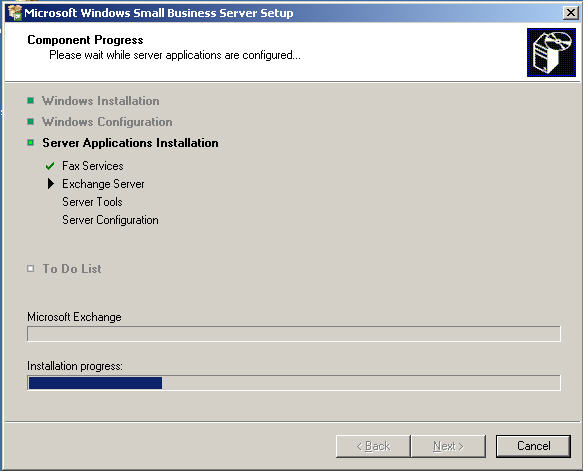
Once again, the progress window will keep you updated on the status of the install. At this point, you will need to swap to disk-2 if you're using CD's.
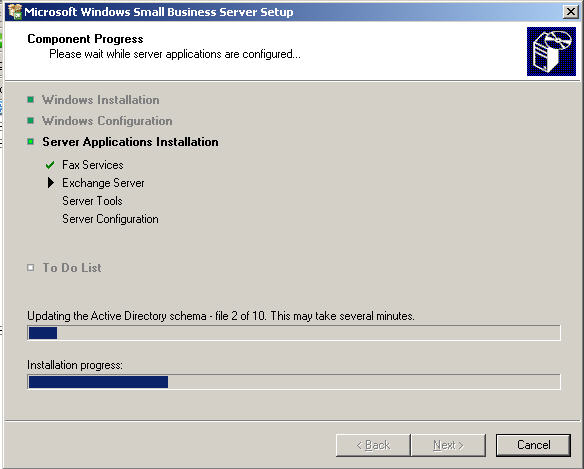
This is a long part of the process as the schema must be
updated for Exchange Server
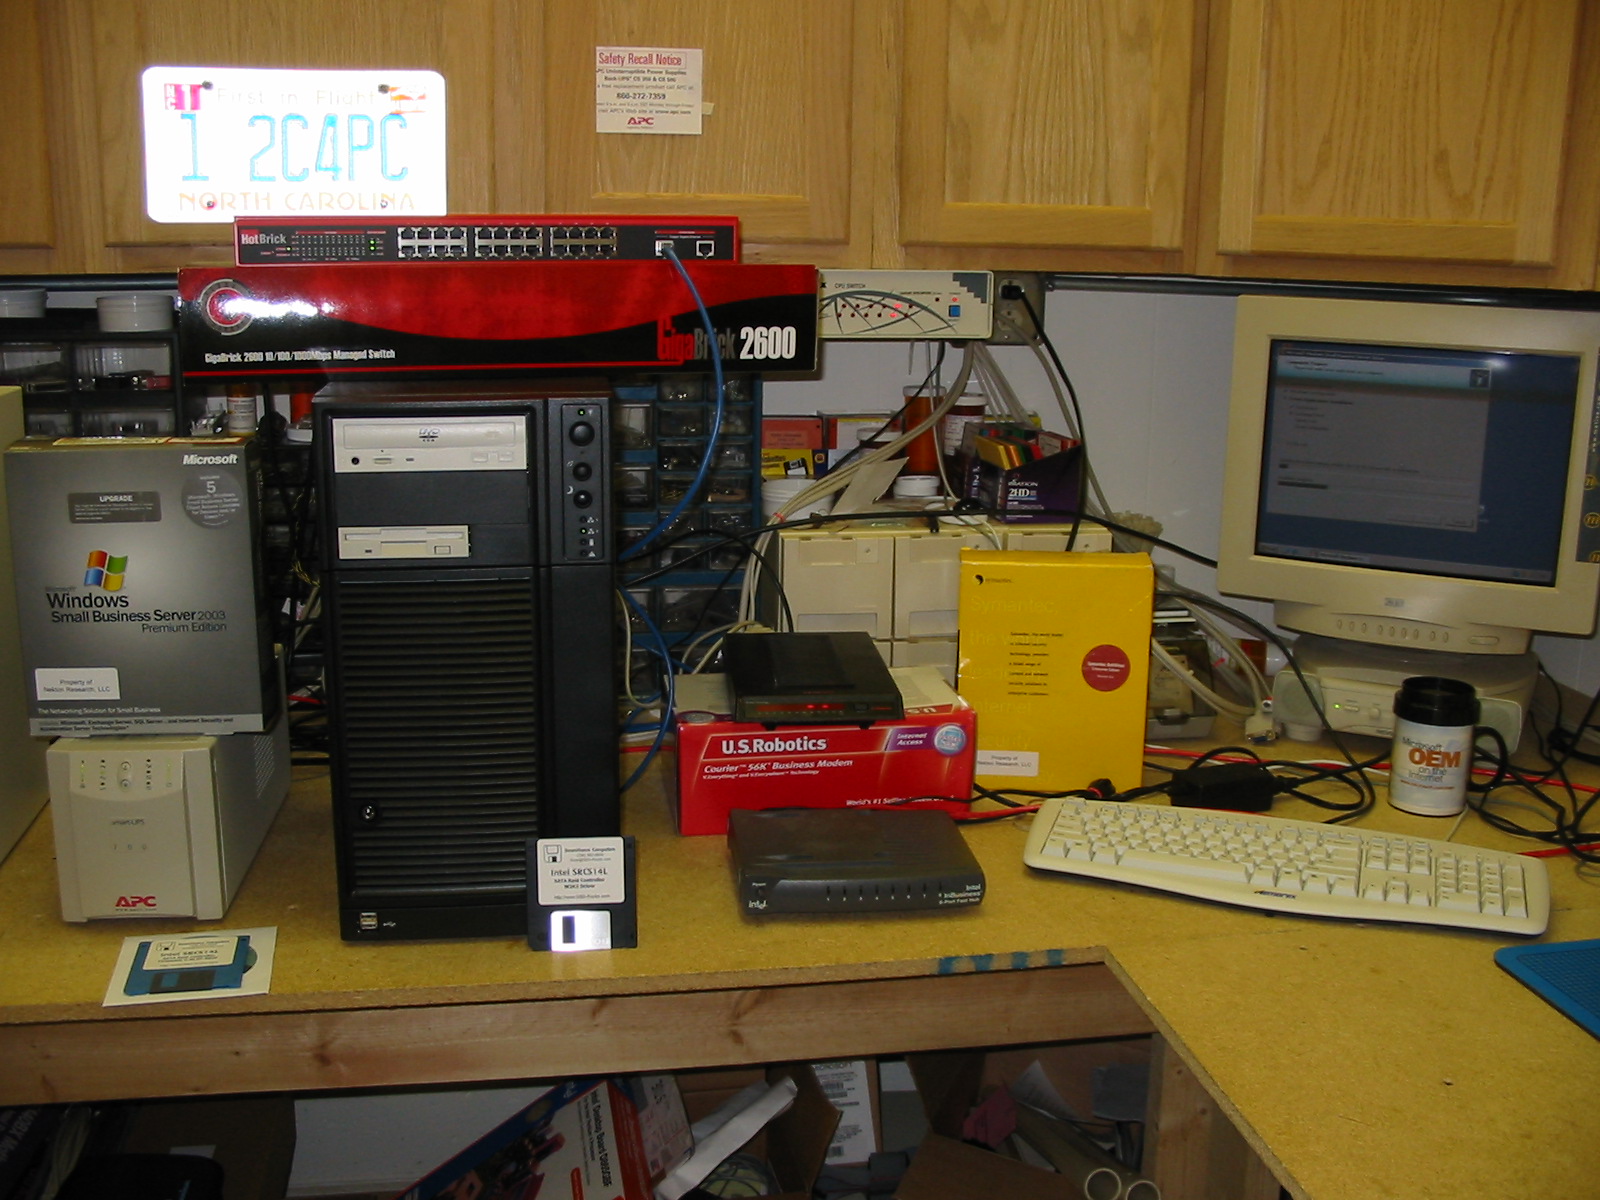
While we are waiting, take a look at an actual install happening. Notice the
Sever is
hooked to to the switch during the entire install process. It is also hooked to
the Modem
out of habit, in the new SBS2003 it is no longer necessary to have the modem
connected
during the initial install as it was previously.
Ok back to work now,
And now disk 3
and finally disk 4 A.K.A the Outlook CD is required.
When setup finishes you should receive this screen telling you it was successful.
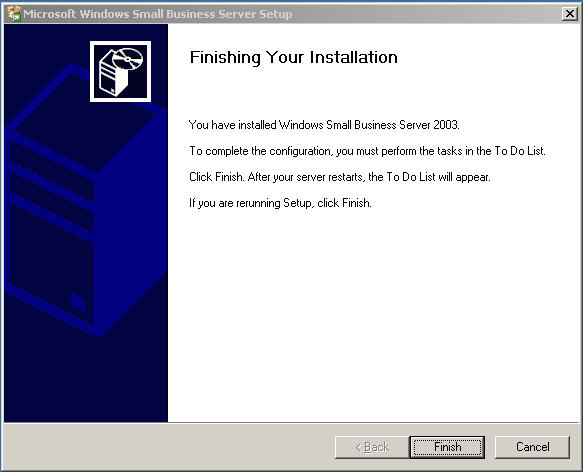
When you click finish you will be presented with the To Do List as below.

In the next article, we will walk through the To Do List. In the meantime, here is a link to some useful SBS2003 sites